

OpenAI’s Large Language Models (LLM) and the chatbot using these models (ChatGPT) have been the latest hype in the AI world, with lots of applications being developed to use these models.
OpenAI has an API that enables the use of these models and several open-source efforts have been launched to support the API in Swift. I’ve been able to use two such open-source libraries for a very simple application having a dialogue with OpenAI models through the API.
The first of these open-source libraries is OpenAISwift by Adam Rush. I found this to be quite easy to use, but had some problems with the GPT-4 based chat interfaces and also noted that the last time it was updated was around July 2023, namely before the final version of ChatGPT 4 was released. It seemed to be missing some of the newer interfaces.
The other open-source library to use ChatGPT with Swift is OpenAI by MacPaw. This library is a collaborative effort and has been updated recently, so I preferred to have my implementation using this one.
OpenAI has several endpoints for its API services. Some of their earlier models (e.g. GPT3.5) use the completions endpoint which allows you to provide a textual prompt and give back a textual answer. However, this endpoint is no longer used for GPT 4 and higher models, so we switch to the chat endpoint.
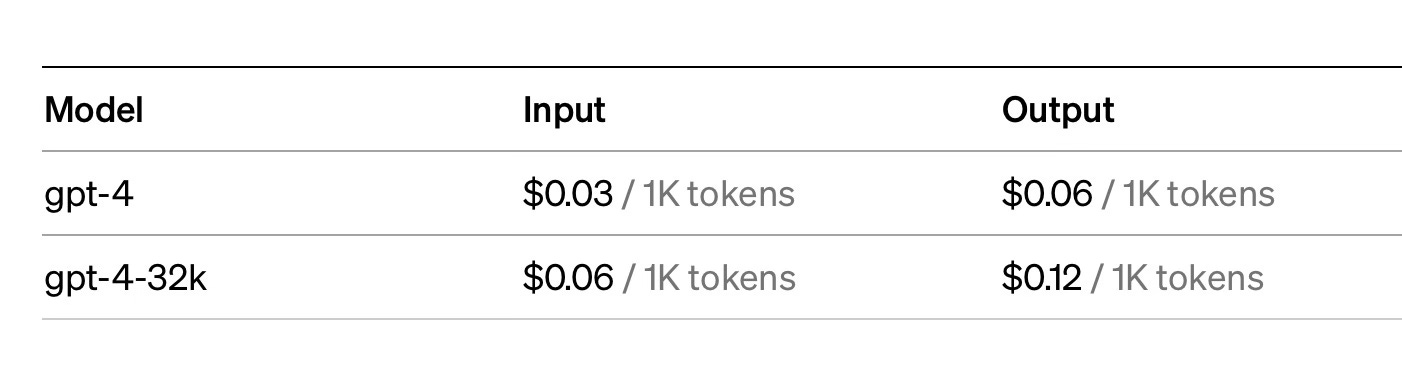
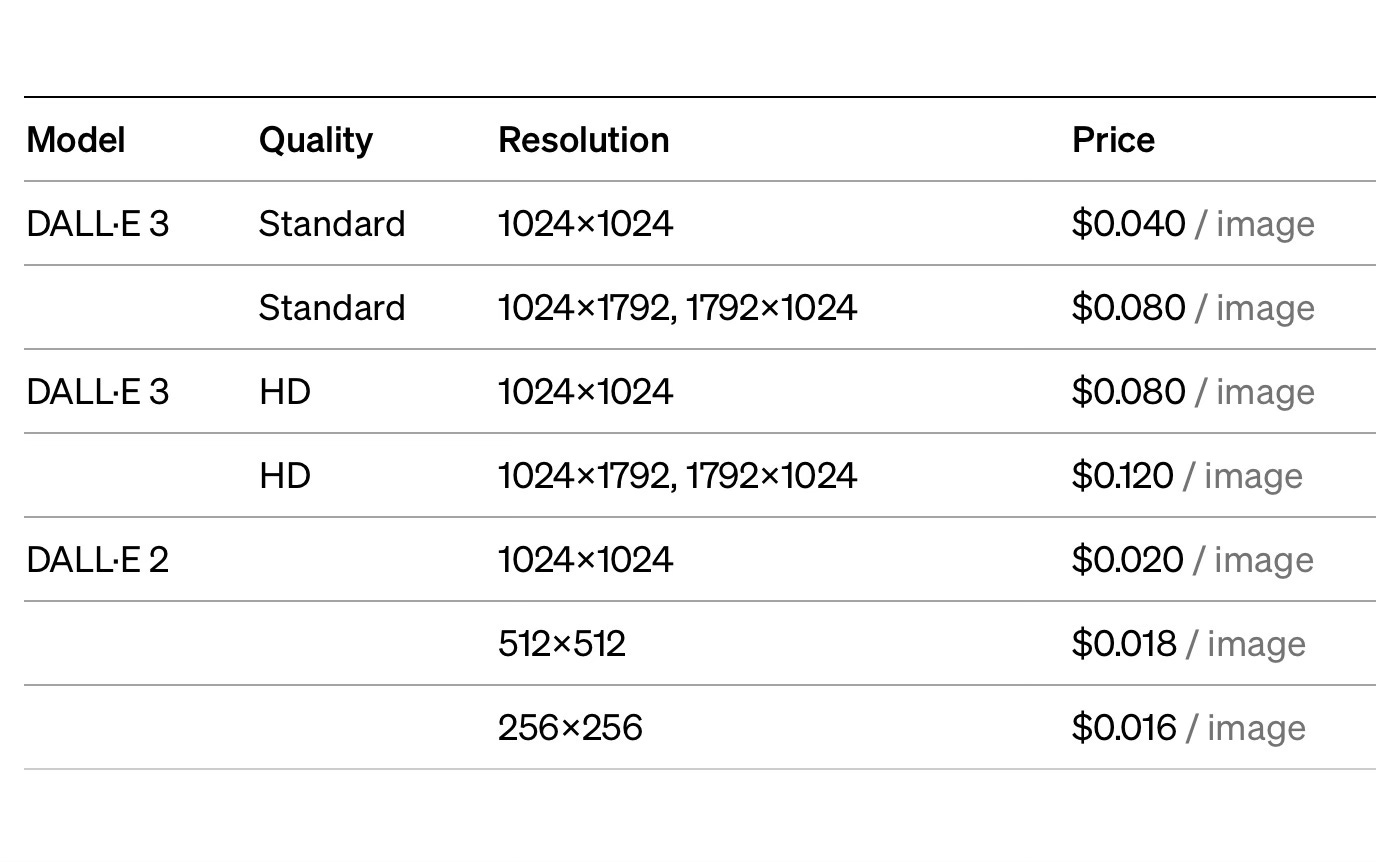
First of all, let us talk about the API key. Any application using the API needs a key to be pre-created and used in API access. Although ChatGPT 3.5 is free to use for the end user, the API is not free. You need to get an API key and load some credits to your OpenAI account (earlier, OpenAI used to give some free credits to each user when they first opened the account, but due to extensive demand, this is no longer possible). API use is per token, both on the input and on the output side. You can find some API pricing figures below. Note the pricing for text use of the API is per token, not per word. On average, a token count of 1,000 equates to about 750 English words.

One thing to keep in mind is that an API key that you would include in your application simplifies the process since it allows the end user to use your application without worrying about API keys and so on (I’m assuming you will charge the user for your application and/or for their use of ChatGPT or DALL-E). However, this creates a security risk, since it is relatively easy to get the API key from the application using certain tools. All charges will be done based on the key, so it is not a good idea to keep this key openly in the code of the application. We will follow up with several strategies for keeping your API key secure in a future post.
I had already got my API key from OpenAI and attached it to a global variable in my application.

I then initialise the API at a convenient place, before we run the chat interface.

I want to save any chats that I perform, so the first thing is to define the classes that would be used to save the chats. I will use SwiftData for persistence.


A saved chat record will consist of a single Chat object which stores one or more ChatLine objects. You will see the variable chatLines that shows the relationship between a chat and its lines. Each ChatLine is a prompt-response pair which shows the input and output of the chat. You will also see an array of generated images, which will store any images we will generate through a Chat, to be covered in a future post. We will concentrate on the textual chats first.

A simple navigation stack with a list of chats in it. The user can click on one of the chats to go to the RunChatView to continue any dialogue already executed before. The variable chats is queried through a SwiftData @Query statement so that previous chats are loaded when the application is launched and the ChatListView is displayed.
Let us now look into RunChatView, which will do the API work.

This is another navigation stack which displays all the chat lines for the particular chat in a vertical structure, with the prompt and result. The bottom of the page has a text field to get the user’s prompt and a button to send the prompt to GPT-4. Note that the button uses the Task statement to make sure it can run an asynchronous method. There is another button to generate an image, which we will cover in the future.
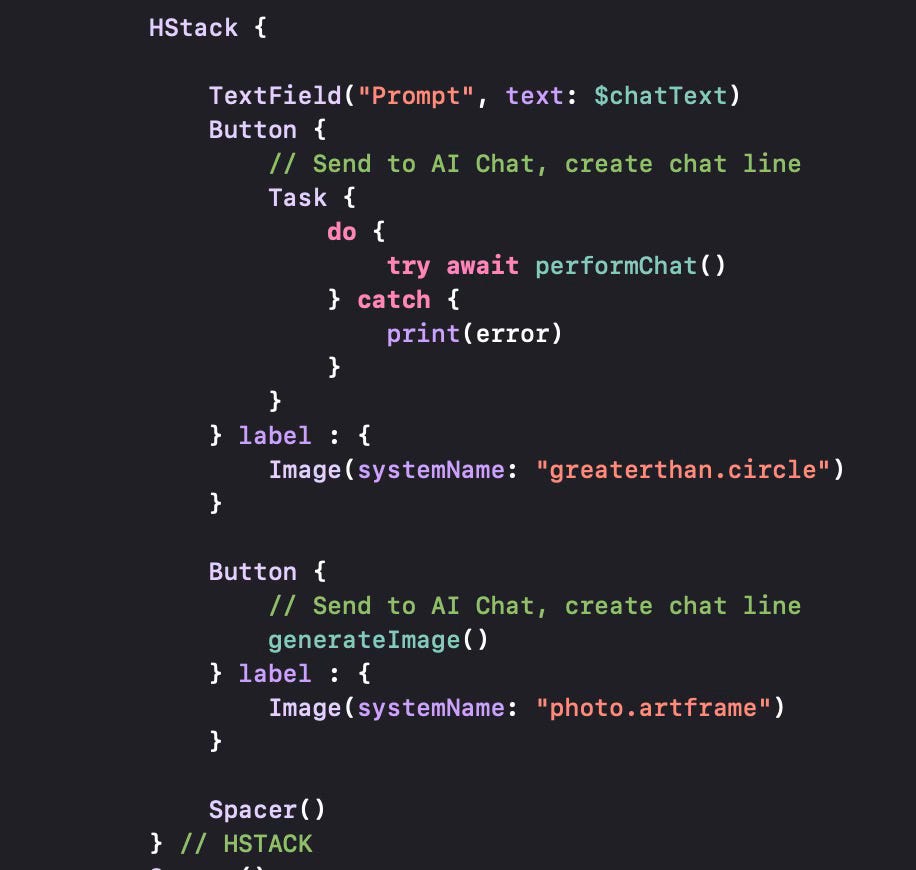
Since the API for Chat is asynchronous, we have to define an asynchronous function that will interact with the API. try await performChat does the asynchronous call.

While implementing performChat, we will need to create structures that will be used in the OpenAI API first. A ChatQuery (as defined in the OpenAI Swift Package) is a query structure we initialise with the model (we select .gpt4 here) and one or more messages in an array. Messages have a role and content (text), so we can prepare multiple messages with different roles (.system, .user, .assistant for the three chat roles and .function for function calling). But in this first sample, we will only prepare a single line, thus we put the text typed in by the user as the content for the single message.
Then we asynchronously call the openAI.chats method to start the chat and obtain the result. We then create a chat line, put the result (answer) in the chat line and add the chat line to the SavedChat object. SwiftData saves automatically, so we do not have to save explicitly.
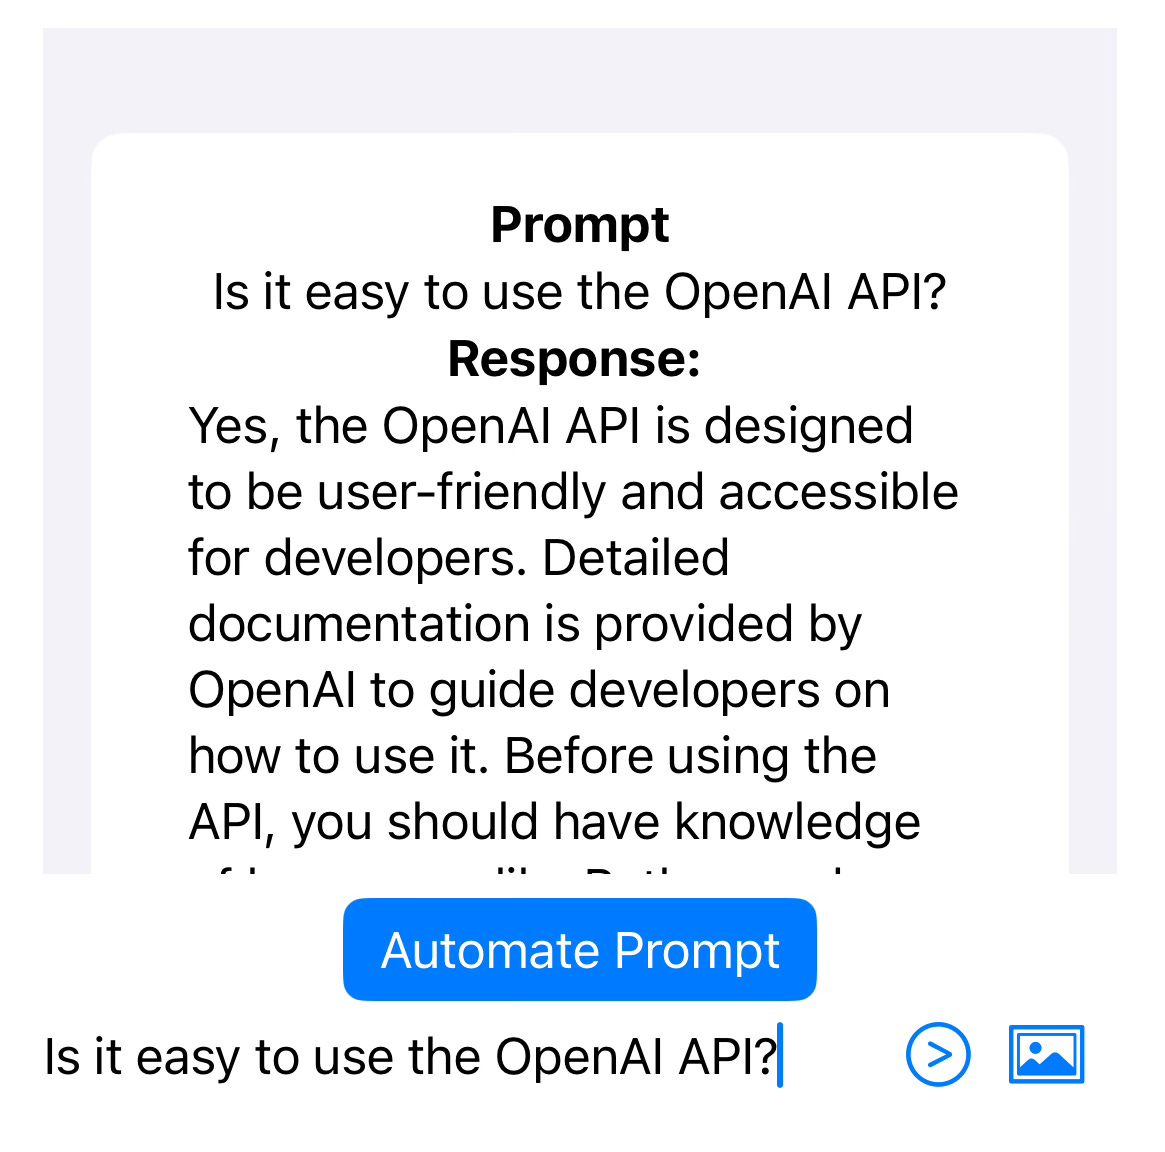
That’s all there is to it. Once we use this, we will get the questions and the responses, to be saved for future reference.
In future posts, I will use the generateImage API call and see how we can save or exploit the generated images. I will also try to improve the user interface to make it more usable.
.